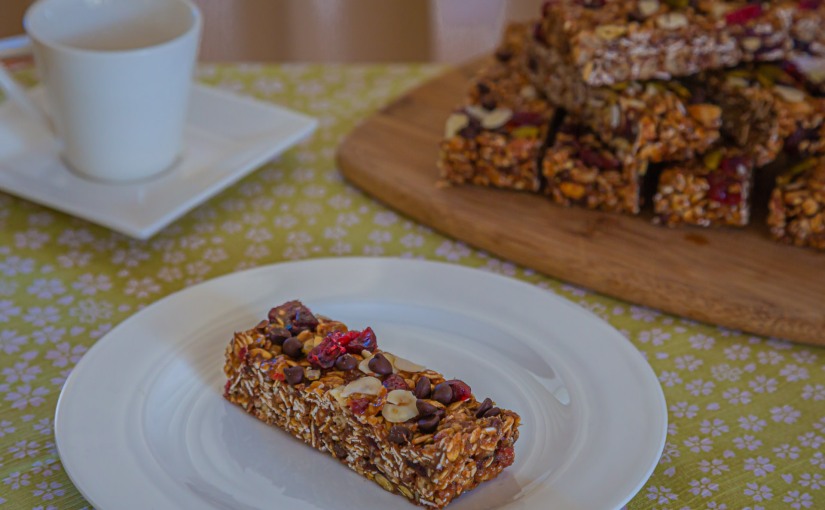
The versatility of a recipe is a high priority for me when cooking or baking and I tend to gravitate towards dishes that can withstand a degree of creativity and tolerate substitutions to whatever might be at hand. These chewy granola bars fit this bill.
I have always preferred chewy granola bars compared with their crunchy counterparts and marvelled at their gooey consistency. The chewy texture always seemed a bit magical considering they were usually loaded with crunchy nuts and seeds. When I first made this recipe, even though the mystery of the chewiness was revealed, I am pleased to say they still taste just as good!
The main dry ingredients include:
1½ cups (150g) rolled oats
¾ cup (25g) rice crisp cereal
Mix and Match Ingredients:
Use about 1½ cups in total of any of the following combinations:
One of my early introductions to whole foods plant-based (WFPB) eating was through a documentary on Netflix entitled Forks and Knives. The film, created by Brian Wendell and first released in 2011, explores the premise of food as medicine and suggests that by changing our nutrition, it can be a powerful way to live longer, help the environment, and reduce the risk of getting sick.
The documentary follows the personal journeys of Dr. T. Colin Campbell, a nutritional biochemist from Cornell University, and Dr. Caldwell Esselstyn, a former top surgeon at the world-renowned Cleveland Clinic.
Dr. Campbell at the T. Colin Campbell Centre for Nutrition describes WFPB eating as eliminating the “diet” label and thinking of it more as a “lifestyle” choice. He further suggests that is not about eating restrictive and complicated meal plans, deprivation, binging and guilt but simply a “return to whole foods, rich flavors, and natural health.”
What can I eat?
In a nutshell: whole (minimally processed), unrefined, plant-based foods:
In abundance
Fruit
Vegetables
Tubers and starchy vegetables
Whole grains
Legumes
Greens
Omega 3 rich seeds
Spices
In Moderation:
whole nuts
seeds (except omega 3 sources)
coconut and avocado
dried fruit
natural sweeteners
tempeh and tofu
whole grain flours and breads
plant-based milks
Avoid or Minimize:
meat, poultry and seafood
dairy products
eggs
refined sweeteners
refined grains
refined sugars
bleached flours and white bread, pasta and rice
What are the benefits?
The proposed benefits of this type of WFPB lifestyle can be significant and may include:
Weight management: reduces need to count calories since plant based foods tend to contain mostly fiber and water creating a feeling of fullness while consuming few calories
Disease prevention: may lower the risk of some cancers and prevent, halt, or even reverse chronic diseases, including heart disease and type 2 diabetes
Lighter environmental footprint: reduces stress on the environment
Will I need Supplements?
The main essential nutrient missing from a WFPB diet is B12. Although this can be found in some fortified foods such as plant-based milks, the best source is a B12 supplement.
What is the difference between a WFPB Diet and a Vegan Diet?
The main difference between a WFPB and a vegan diet is that a vegan diet avoids all forms of animal products or exploitation, however, it is not necessarily a diet that focuses on whole plant foods. It may include refined and processed foods whereas WFPB eliminates or minimizes these as well as animal products.
How do I get Started?
If contemplating a WFPB lifestyle, check out Dr. T. Colin Campbell’s Three-Day Meal Plan for some ideas on what your meals might look like!
Roasting is one of my favourite ways to prepare vegetables and lately I have been serving them with a variety of creamy tahini-based sauces such as lemon, lime or orange flavours. However, a marinade is also a great way to intensify the flavour of food with just a few simple ingredients.
What is a Marinade?
Basically, a marinade is a liquid with seasoning for soaking food before cooking to enhance its flavour and texture. The roots of the word marinade come from the Latin word for sea (mare) and early uses of the word referred to steeping food in heavily salted liquid as way to preserve, flavour and tenderize.
However, today, marinades can include mixtures of vinegar, oil, herbs, or similar ingredients and the process of immersing foods in liquids can vary from minutes to days, and even months in unique situations.
Origins of Marinating
The specific ingredients in a marinade depend on the country of origin and also on the particular chefs. According to Slurrp, the concept of marinating food can be traced to the deserts of Ancient Egypt.
Dishes in Asia have been marinated in soy sauce for centuries and in Roman times, marinades were added for flavouring. From the 13th century, the French also began marinating their food and in North America, bottled marinades have been used since the 1800s.
Recipe
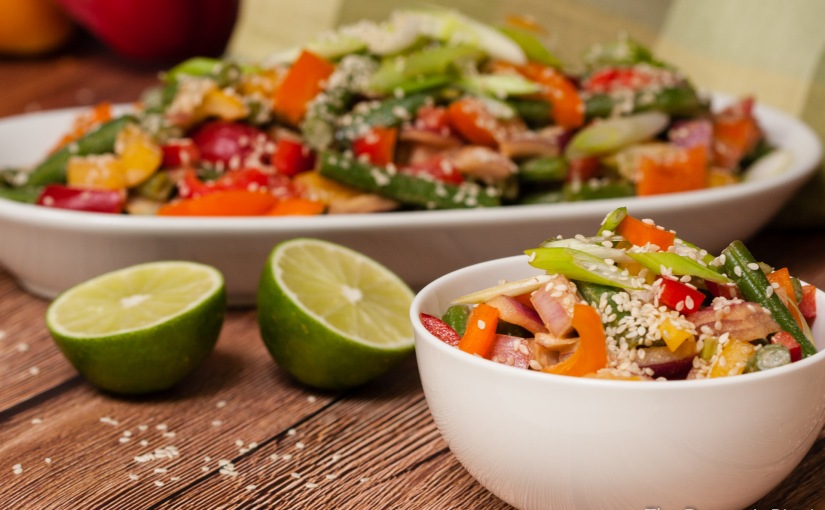
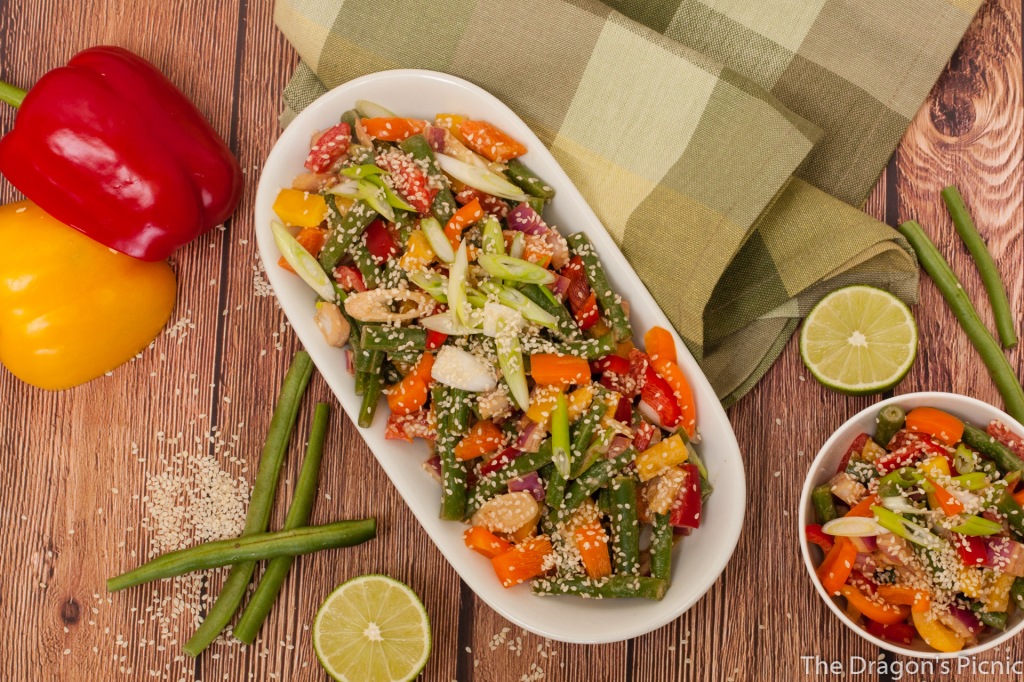
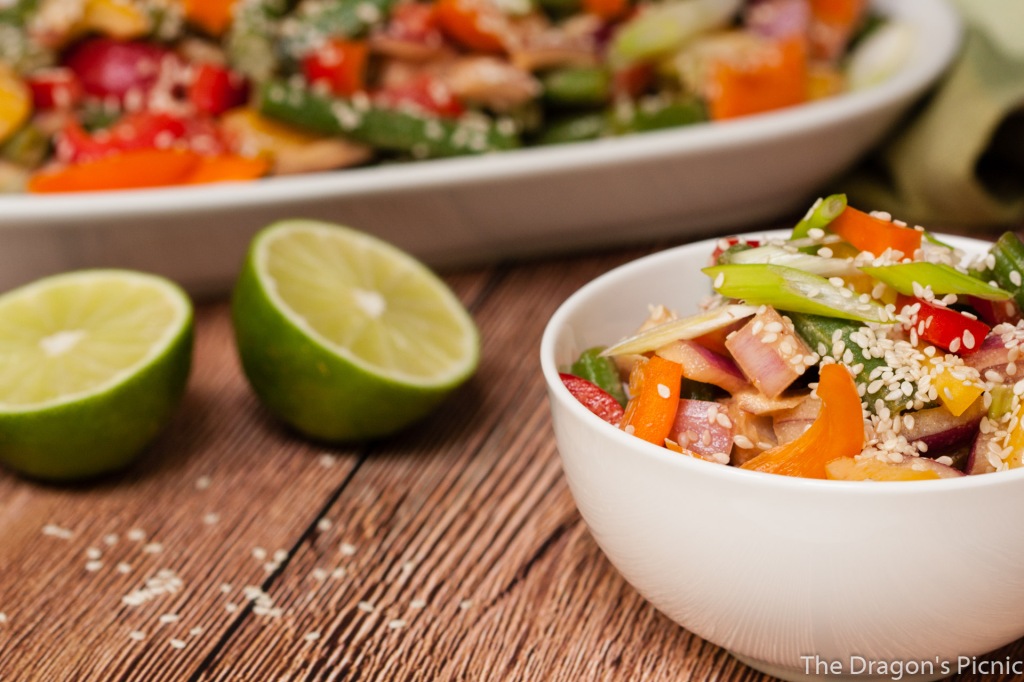
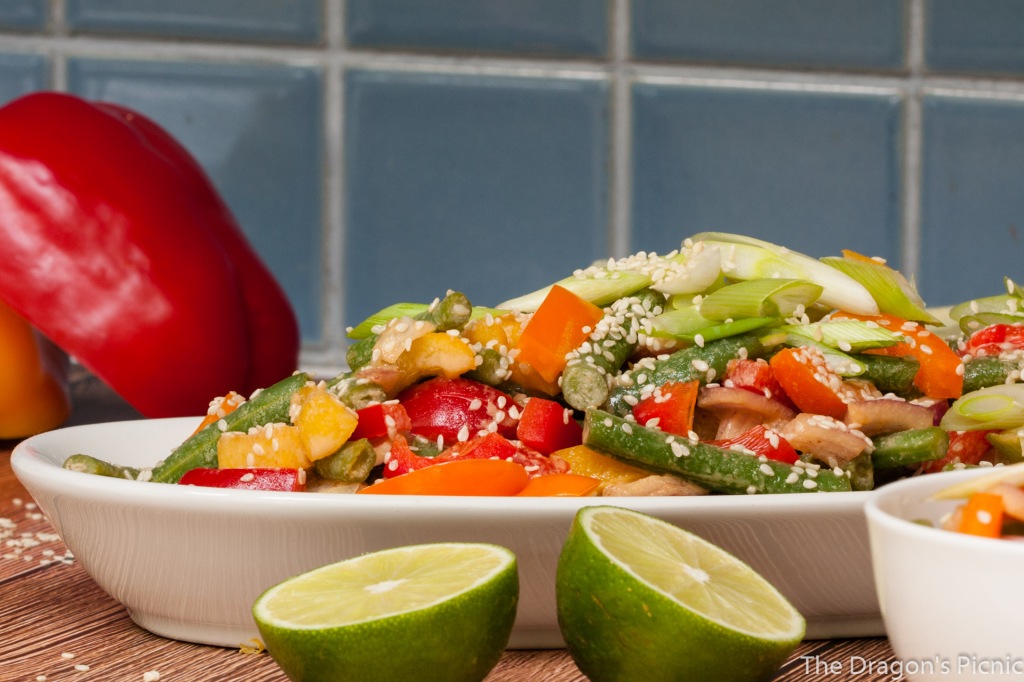
This salad is inspired by Deliciously Ella and is a tasty and crunchy, light summer salad. It is quick and easy to put together although it does need about an hour to marinade in order to infuse the colourful ingredients with more flavours. This recipe will serve 2-4 people and is very versatile as it can be used as a side or a main dish served with other additions such as some crumbled vegan feta cheese.
Ingredients:
2 peppers (mix of red, yellow or orange)
225g green beans
2 spring onions
1 TBS sesame seeds
1/2 red onion
Marinade:
2 TBS tamari
1 TBS brown rice vinegar
1 TBS toasted sesame oil
1 TBS maple syrup
1/2 lime, juice
pinch of salt
Topping:
1 TBS almond butter
1 TBS toasted sesame oil
1 TBS brown rice vinegar
1 TBS tamari
1/2 lime, juice
pinch of salt
Instructions:
Prepare green beans and chop into bite-sized pieces and add to boiling water and blanch for about 3 minutes. Drain and rinse under cold water to prevent further cooking.
Add to a bowl with chopped peppers, red onion, spring onion and sesame seeds.
Mix the marinade ingredients and add to the salad coating everything in the liquid and cover and refrigerate for at least an hour.
Mix together topping ingredients until it is a smooth consistency.
When ready to serve, add the topping and a sprinkle of sesame seeds onto the salad mixture.
Closing Thoughts
Although marinades work well with many foods, optimum soaking times do vary. Harder vegetables like potato, carrots and beets need at least 30 minutes and can be soaked overnight, whereas semi-hard vegetables such as green beans, asparagus, and peppers work well between 30 minutes to a few hours. Softer foods like tomatoes and greens only need about 10 minutes and, when marinated for longer than 30 minutes, they risk releasing water and getting soggy.
For a complete meal, don’t forget the vegetable proteins like tofu, tempeh and seitan which marinade well for at least 30 minutes or up to several hours. The only downside of marination is that it does require planning ahead, but it is worth it as an easy way to be creative with adding flavours to everyday foods.
“Do you know the muffin man who lives in Drury Lane …” is mentioned by Snopes as a popular nursery rhyme which is rumoured to have been used as a “caution to children, warning them to beware of a 16th-century baker-turned-serial-killer who enticed his young victims by pulling a muffin down the cobblestone streets of London with a string”.
Snopes further says these tales are largely unproven especially considering the rhyme was not recorded until 1820, long after the supposed existence of this “baker-turned-serial killer”. However, a real muffin man of Drury Lane, may well have inspired the rhyme. Drury Lane is a thoroughfare which borders Covent Garden in downtown London and, during the Victoria period, fresh food was delivered door to door by a “muffin man”. The modern English muffin is the descendant of the “muffin” in this rhyme.
Quick Bread Muffins
Although the English muffin is a yeast-leavened bread, what I have now come to think of as a muffin is the North American style of cake-like treats. These are quick breads, using chemical rather than yeast leavening, with a thick batter and cooked in individual moulds. Anything goes when it comes to different types of muffins whether it be savoury or sweet, large or small, they are really only limited by your imagination.
Recipe
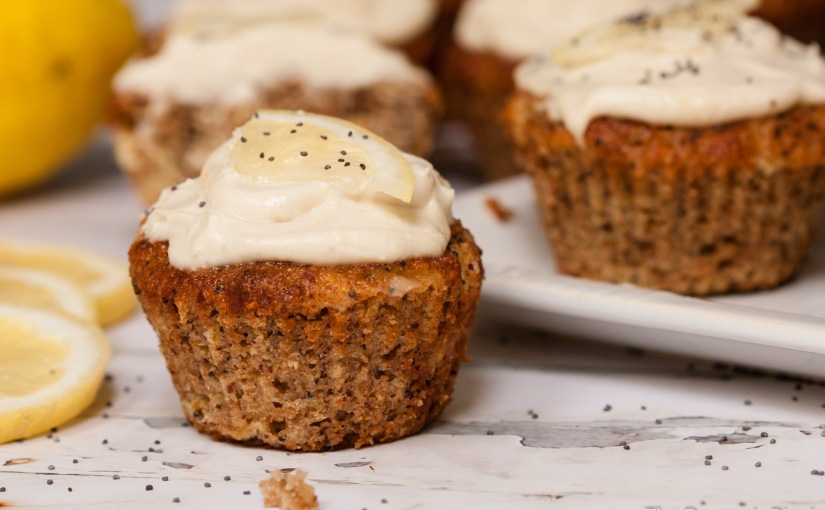
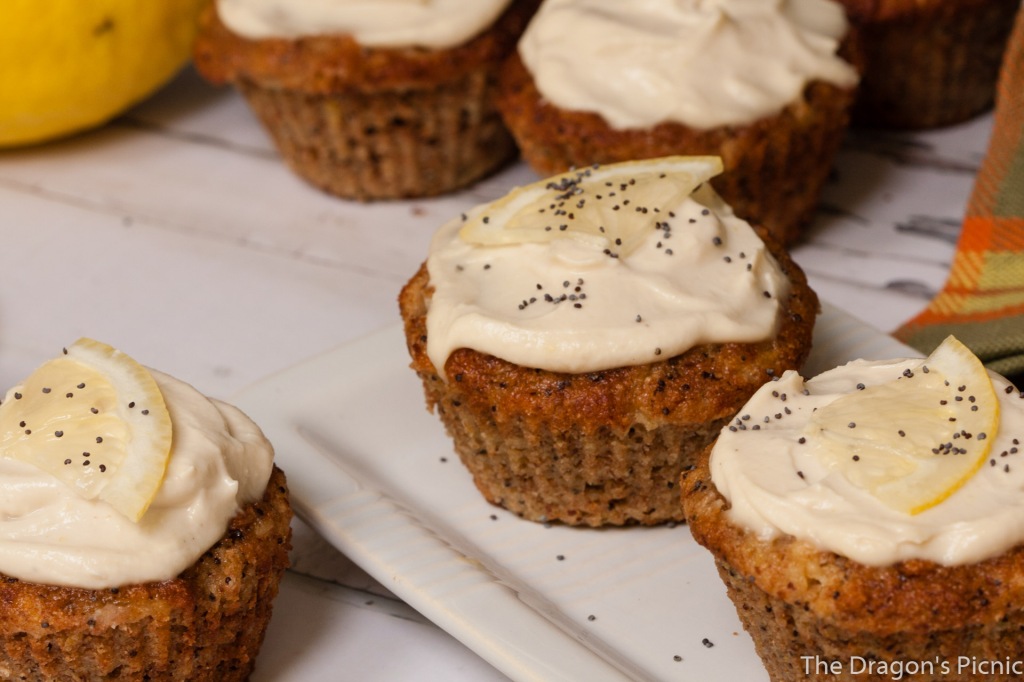
This recipe is inspired by the Minimalist Baker. They are quick and easy to make and the end result is a “moist, wholesome, perfectly sweet-tart, and delicious” treat which is vegan and can be made gluten free*. The recipe is extremely versatile and the poppy seeds can be omitted or substituted with fruit, nuts or seeds.
This recipe yields 12 small muffins which will keep for 4-5 days and any leftovers are freezer friendly for about a month.
1 cup whole-wheat pastry flour (or sub unbleached all-purpose)*
1/2 cup rolled oats*
1/2 cup almond meal**
Basic Icing:
1 cup powdered sugar (sifted)
1 Tbsp lemon juice
Cashew Frosting:
3/4 cup raw cashews (soaked 2-3 hours and rinsed)
2 Tbs melted coconut oil
3 Tbs maple syrup
1 tsp vanilla
1 Tbs lemon juice
zest of lemon
1/4 tsp salt
1-3 Tbs water (as needed for blending)
Instructions:
Preheat oven to 375 degrees F (190 C) and line a standard muffin tin with 12 paper liners, or lightly grease.
Prepare flax eggs by mixing flaxmeal with the water in a large mixing bowl and let rest for a few minutes. While waiting, zest lemon(s).
Add applesauce, lemon zest, lemon juice, vanilla, oil, almond milk, maple syrup or agave, cane sugar, baking soda, salt and whisk (it will foam up because the lemon juice will react with the baking soda).
Add flour, almond meal and oats and stir until just combined, being careful not to over-mix. The batter should be quite thick and scoopable rather than pourable. If the batter appears too thick, add a touch more almond milk. Add the poppy seeds and gently stir once more.
Divide batter evenly between muffin tins (makes 12 small muffins).
Bake for 22-28 minutes or until a toothpick inserted into the center comes out clean. Let cool for 5 minutes in the pan, then remove from tins and let cool completely on a cooling rack.
To make the basic icing, whisk the sifted powdered sugar and lemon juice together in a small bowl until a thin, pourable glaze is formed and brush or drizzle on the muffins.
To make the cashew frosting, soak the cashews for a few hours and then blend using a high-speed blender with the remaining ingredients until icing has a thick, spreadable consistency.
Notes:
*To make this recipe gluten-free, use gluten free rolled oats and sub a gluten free flour blend for the whole-wheat pastry flour. **If you don’t have almond meal on hand, just replace it with more whole-wheat pastry flour.
Closing Thoughts
These muffins have the bright, citrusy flavour of lemons and can be enjoyed on their own or with the addition of either a simple icing or a rich cashew frosting. The muffins pictured here have the cashew frosting and, with this level of decadence, they are starting to more closely resemble a cupcake! Although it can be tough to visually distinguish a cupcake from a muffin, apparently there are a number of differences in the ingredients and baking methods. However, the actual differences between a muffin and a cupcake … well, that is a whole other story!!
For more information about the Minimalist Baker and other great whole food, plant-based ideas, see Resources.
Along with many others, when I think of comfort food I often gravitate towards grains, breads, and pastas. As grains are naturally high in fiber, they tend to leave you feeling full and satisfied. However, not many of us would think of a salad as comfort food but adding grains to vegetables, and other typical salad ingredients, can make for a tasty and satisfying meal.
Craving a sweet treat? For as long as I can remember, I have always reached for something sweet at the end of a meal. It has definitely been a time-honoured tradition in our family to enjoy dessert and it is a habit I have never considered giving up. However, what has changed over time is the type of treat that I find will satisfy the sweet craving and it no longer needs to be something full of refined sugars, saturated fats and processed ingredients.
When eating a diet consisting mostly of vegetables, there are many ways to make the meals varied and interesting. This can include the cooking methods used ranging from frying in butter or, my particular favourite of roasting, or by changing them visually such as spiralising, grating or julienning!
Seasonings are also key and can include salt and herbs to bring out the flavour or add something tangy like lemon juice which is sure to liven up many a veggie. Another method that I find increasingly appealing is adding a flavoured sauce or, alternatively, a mixture of flavours found in the many types of chutneys available.
If I could only eat one food for the rest of my life, there is no doubt that bread would be high on my list. My favourite types of bread have always been the heavier loaves such as pumpernickel, multigrain and soda bread. So, in complete contract, when I recently discovered Japanese milk bread with its soft, springy texture, it was a surprise to find it so appealing.
Although advancements in medicine and research have made dramatic differences to health and life expectancy, acceptance of the positive role that diet and nutrition plays in health is also gaining momentum. There is little doubt as to the benefits of a diet consisting of fruit, vegetables and whole grains, however, the cost of preparing a meal from scratch – as opposed to processed foods – can be significantly higher. One relatively easy and economical way to add abundant nutrition to any diet is through sprouting.
Why Sprouting?
In a nutshell, while plants are developing, they produce increased amounts of phytochemicals and anticancer compounds so eating young plants provides the highest concentration. To boot, sprouts are tasty, nutritious and easily digestible and are a simple and inexpensive way to grow vegetables at home, in any climate and at any time of the year.
Sprout History
Although in the last 30 years there has been a surge in interest, sprouts have a long history, medicinally and nutritionally and according to the International Sprout Growers Association, “it has been written that the Ancient Chinese physicians recognized and prescribed sprouts for curing many disorders over 5,000 years ago”. In the 1700s the high Vitamin C content of sprouts made them valuable for sailors to ward off scurvy and during World War II interest in sprouts was generated with this announcement …
“Wanted! A vegetable that will grow in any climate, will rival meat in nutritive value, will mature in 3 to 5 days, may be planted any day of the year, will require neither soil nor sunshine, will rival tomatoes in Vitamin C, will be free of waste in preparation and can be cooked with little fuel.”
An apt summary of the humble sprout!
Variety of Sprouts
Sprouting falls into three categories: sprouts, shoots and microgreens. There are over 100 different types ranging from the highly nutritious broccoli sprouts which boasts between 10 to 100 times more cancer-fighting compounds than the more mature florets, the peppery kick of radish sprouts, fenugreen’s nutty, slightly sweet but mostly bitter taste and the gentle flavour and slight crunch of red clover.
How to Grow Sprouts
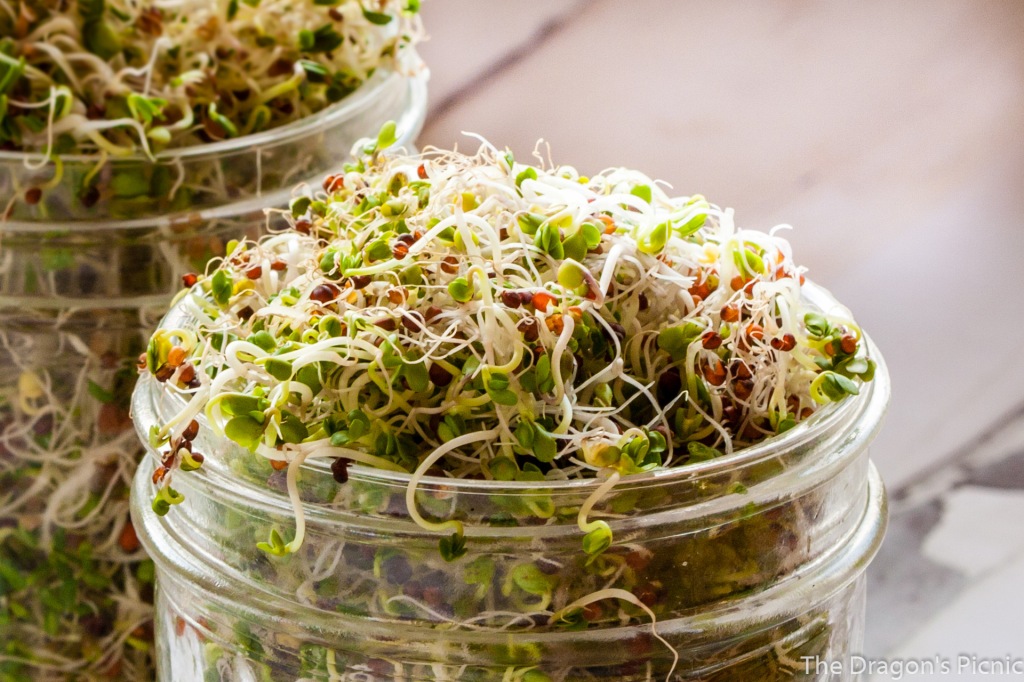
Although there are numerous ways to sprout ranging from a multi-tiered sprouter to a hemp bag, the method I use is wide-mouthed mason jars with a sprouting lid and a shallow bowl that allows the jar to drain while inverted at an angle. Before I purchased the sprouting lids, I simply used some cheesecloth with a rubber band.
Depending on the type of seeds used, Mumm’s Sprouting recommends adding “1-2 TBSPs of small seeds, or ¼ – ½ cup of large seeds in the jar. Rinse the seeds with water and drain. Let the seeds soak in the jar for approximately 2 hours (broccoli family), 6 hours (small seeds) or 12 hours (bigger grains or beans) in enough water to allow them to swell completely”.
I have been using the broccoli seeds or mixes of radish, alfalfa, mustard and red clover and find that 1 to 1.5 TBSPs nicely fills a 500ml mason jar when sprouted. After the initial soak, rinse the seeds a couple of times a day and place the jar away from direct sunlight, upside down and on an angle to allow the excess water to drain out and air to circulate.
1-2 days
4-5 days
After 4-5 days, leafy sprouts should be rinsed and then left upright for half a day in the light before being stored in the refrigerator for up to 10 days. During growth, some sprouts tend to clump together so they can be stirred gently with a fork. Also, if you need to remove excess moisture, you can add a piece of paper towel and store them upside down.
Closing Thoughts
There is something very satisfying about growing your own food and watching seeds sprout and flourish ready for harvesting. I now tend to have one or two on the go at any one time so there is a steady supply. In terms of serving, they can be added to a leafy green salad, used to garnish sandwiches and wraps or blended into a smoothie with fruits and vegetables.
There are so many varieties of sprouts available and it is such an easy and economical way to add flavours and textures to food while packing nutrients, fibre and protein. With sprouting, a plant-based, whole food diet never looked so good!
A big thank you to Greedy Bear Bakes for this nomination. Although the Dragon’s Picnic has not posted for a few months, this seems the perfect final post on my WordPress blog. I am moving to a self-hosted site and although it is not up and running just yet, please drop by some time in the future! I wanted to thank everyone for their support during my time with WordPress and I feel very fortunate to have come across many interesting people and their blogs.
Greedy Bear Bakes has been one of my favourite blogs so please be sure to check out their blog – such a fantastic name and logo and full of tasty vegan recipes!
What is the Golden Bloggerz Award?
The Golden Bloggerz Award was created by Chris Kosto to motivate and reward all the amazing bloggers who work hard every day to serve their audiences and deserve some recognition.
The Rules
Place the award logo on your blog.
Mention the rules.
Mention the award creator and link to their blog.
Thank whomever nominated you and link to their blog.
Tell your audience three things about you.
Answer your nominator’s questions.
Nominate 10 people who deserve this award.
Ask the nominees 5 questions of your choice.
Let the nominees know of their nomination by commenting on their social media or blog.
Share links to 2-3 of your best/favorite posts.
Three Things About Me
I enjoy wildlife photograph. When that is not available, I settle for photographing food .. it is much easier to locate and tends to stay still for longer!
At the beginning of this year, I completed a virtual challenge which involved running the 297 km of the Cabot Trail in Canada.
I was born on a small Mediterranean island in the middle of an air raid.
Answers to Greedy Bear Bake’s Questions
Why did you start blogging?
To provide a focus for my love of writing and photography as well as to share information and recipes for plant-based eating.
What have you learned that you wished you had known when you started your blog?
To be clear about my own reasons for creating and maintaining a blog and to stay true to that.
What is your all-time favourite meal?
My old favourite meal from childhood was Cornish pasties and potato salad. It is something I rarely eat these days but I always think of it as “the” meal!
What are you looking forward to this year?
Returning to house and pet sitting all over the world. A great way to travel and more importantly, a way to get my “pet fix”.
How do you unwind after a hard day’s blogging?
Looking through recipes for the next idea!
My Nominees:
StickyMangoRice – a travel and sketching blog full of amazing, intricate illustrations
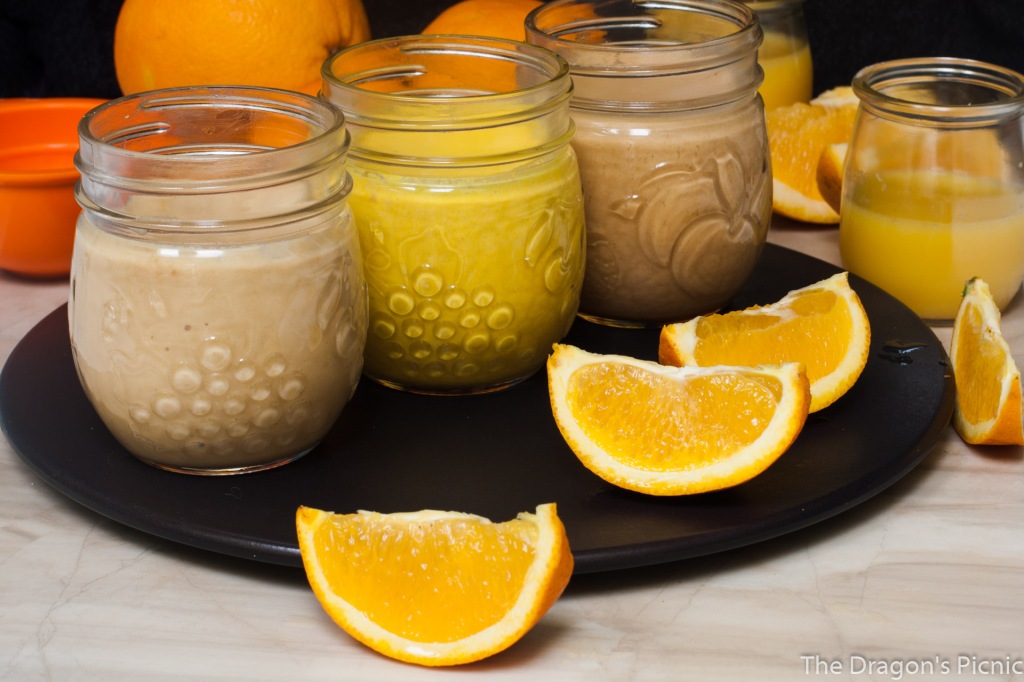
Front to Back: Orange Ginger, Orange Turmeric and Orange Miso
Of the citrus fruits, oranges are probably one of the most popular. Although they are commonplace now, at one time they were considered exotic and precious. I recall from my own childhood, it was a tradition to add oranges to Christmas stockings. As children we were restricted to one piece of fruit a day because of the cost so a juicy and sweet orange was always a treat!
Oranges and their origin
According to Nuovo, botanists believe that citrus trees are native to the tropical regions of Southeast Asia and have been around for 20 million years. Arab traders first brought them from India and Ceylon (modern-day Sri Lanka) to some of the wealthiest families of the Roman Empire. Groves then appeared in Italy, North Africa, Spain and Portugal until at the end of the thirteenth century, they were bought by a Spanish boat to the United Kingdom. Since then, oranges have evolved from the fruit of European royalty and aristocrats to a kitchen staple for the masses.
Ice cream sandwiches have come along way since they first appeared one hot summer on the streets of New York around the turn of the twentieth century. At that time, for the price of a penny, street vendors sold what they referred to as “hokey pokeys” which were slabs of ice cream between sheets of paper. As they were sold on the street, the sandwiches tended to cater more towards working-class individuals, however, the appeal quickly caught on and they soon became a hit with Wall Street workers alike.
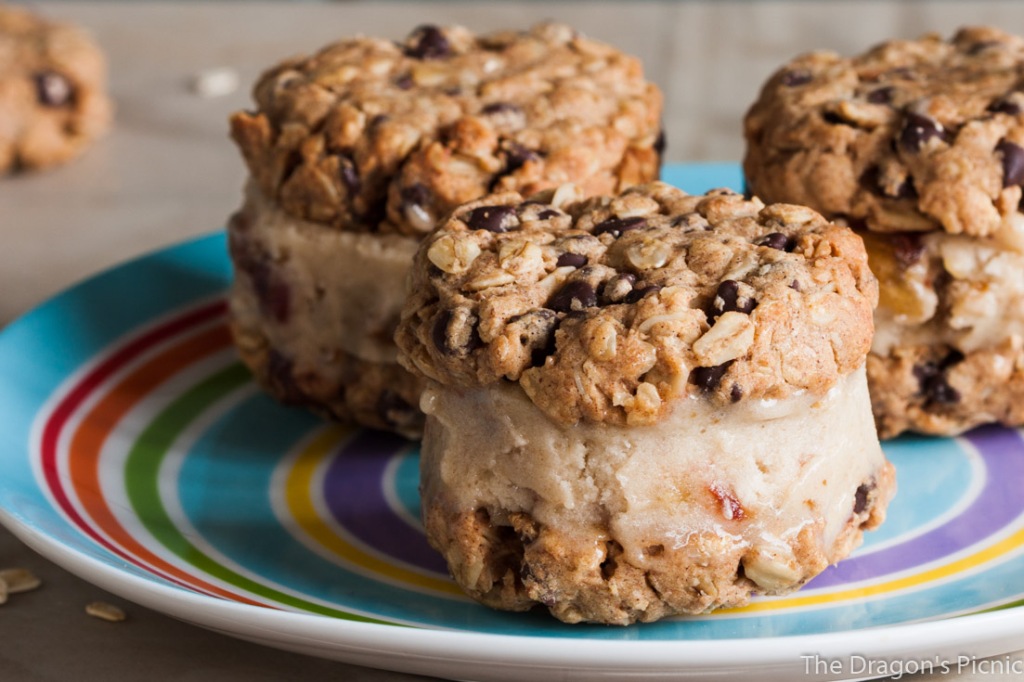
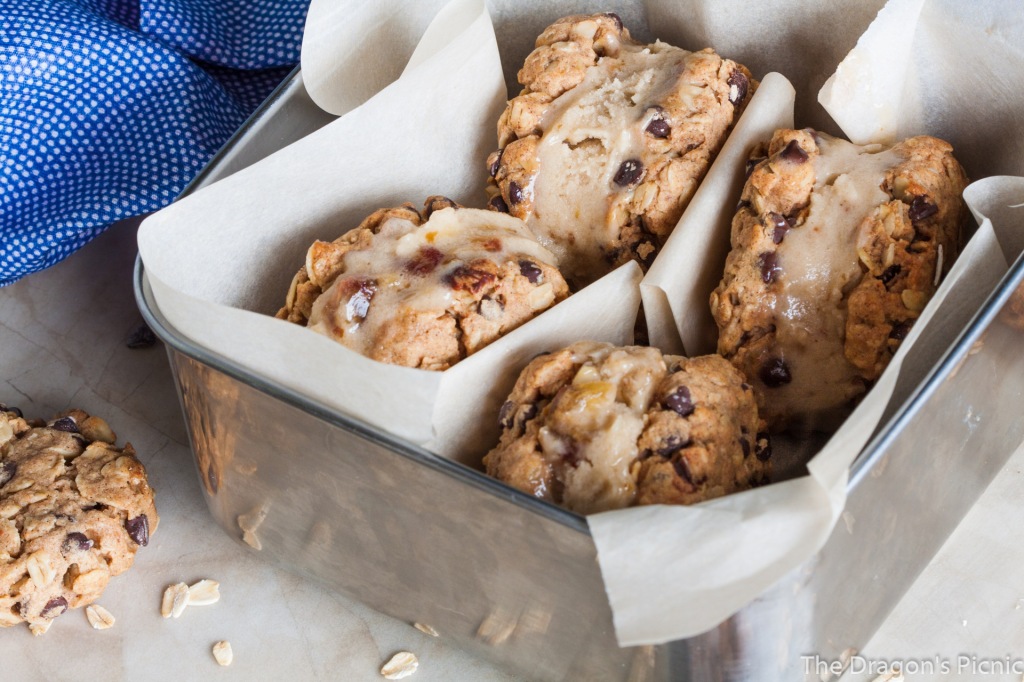
Although the Food Network tells of the earliest known recipe for an ice cream sandwich using two slices of sponge cake, the frozen treat we are more familiar with today is ice cream sandwiched between either cookies or crispy wafers. Since my first introduction to the ice cream and cookie combo, I have never looked back. I had originally thought that plant-based eating would mean saying farewell to such decadence, however, it seems not! With nice cream, a tasty frozen filling, sandwiched between a couple of vegan chocolate chip oatmeal cookies, the treat lives on!
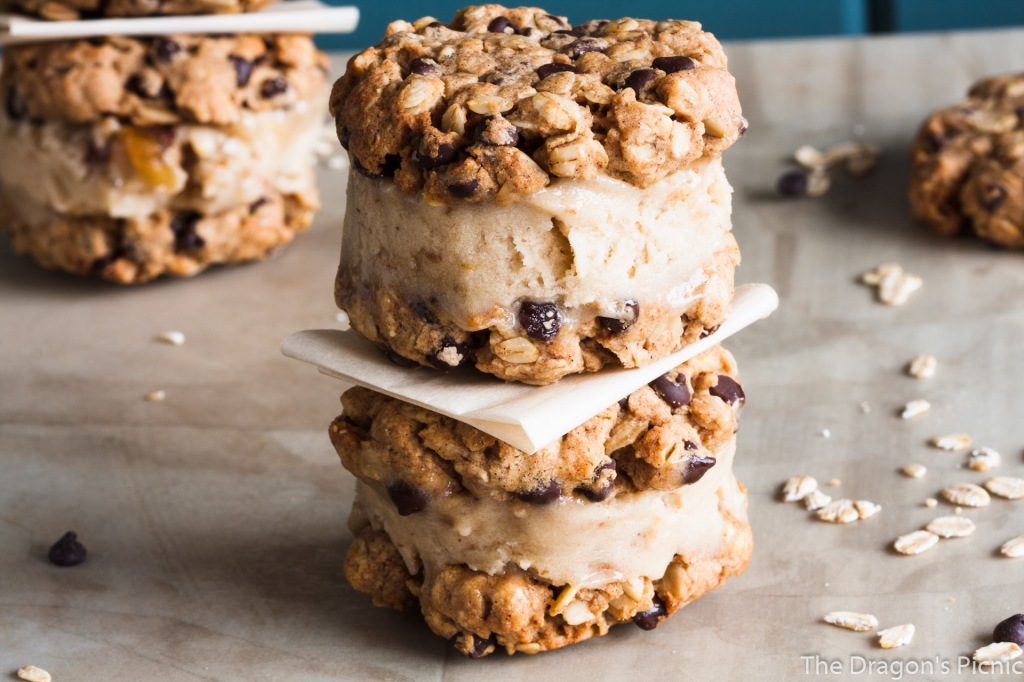
Recipe for Banana Ice Cream Sandwiches
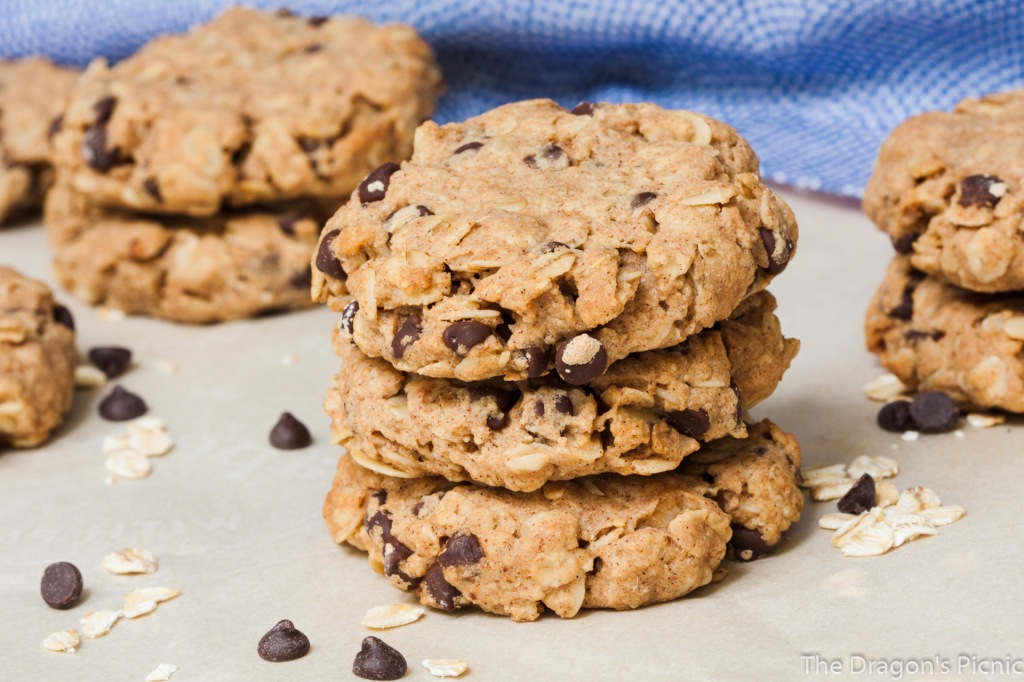
As the popularity of the ice cream sandwich increased, they began to be mass produced and, unfortunately, they are now considered a highly processed food full of fats and sugars. However, this version of the ice cream sandwich is relatively easy to put together and is full of whole ingredients making it a healthier alternative to the traditional treat. The cookies used for this recipe are chocolate chip oatmeal and they can be enjoyed either on their own or made into these delicious ice cream sandwiches filled with frozen bananas mixed with the gooey caramel-like flavour of medjool dates.
Chocolate Chip Oatmeal Cookies:
1 1/4 cups (125g) old fashioned rolled oats
1/2 cup (75g) whole wheat flour (can replace with an all-purpose gluten free flour)
1 tsp baking powder
1 tsp cinnamon
1/4 tsp salt
4 tbsp coconut oil, melted and cooled
1/4 cup smooth almond butter (or peanut butter)
1/4 – 1/2 cup maple syrup (depending on preferred sweetness)
1 tsp vanilla
1/3 cup (60g) dairy-free chocolate chips
Banana Ice Cream Filling:
3 (about 300g) frozen bananas
4 medjool dates, pitted
splash of oat milk if needed
1/2 tsp vanilla extract
Instructions:
To make the cookies: preheat oven to 350 degrees F.
Mix together oats, flour, baking powder, cinnamon and salt and set aside.
Melt the coconut oil and mix with the almond/peanut butter, maple syrup, and vanilla until well combined.
Mix the wet ingredients with the dry ingredients and then fold in the chocolate chips.
The total mixture is just over 450g in weight. For evenly sized cookies, measure out portions of about 37 g (this should make about 12 cookies). Roll each portion into a ball and place on the baking sheet and then flatten into cookie shapes with a lid or the back of a spoon.
Bake the cookies in the oven for 10 to 12 minutes, until edges are golden, then let them cool on the baking sheet for about 10 minutes before transferring to a wire rack.
Once the cookies are completely cool, place them in the freezer for at least 10 to 20 minutes which helps to keep the cookies firm.
To make the ice cream: add chopped pieces of frozen banana to the food processor and blend. Soak the dates in hot water for about 30 mins to soften and then chop and add to food processor. When blending the ice cream, don’t worry if the dates don’t break all the way down as they make tasty chunks in the ice cream filling. If needed, add a splash of oat milk to assist with blending.
To make the ice cream sandwich: place a large scoop of ice cream on the bottom side of a cookie and then gently press down a second cookie on top and place on a baking sheet lined with parchment paper and place in the freezer.
To serve: take ice cream sandwich out of the freezer for 5-10 minutes before serving.
Closing Thoughts
National ice cream sandwich day is August 2nd and these ice creams would definitely be a tasty treat during the long hot days of summer. However, as summer feels a long way away right now, especially as it is likely the coldest week of the year, I find it just as pleasing to enjoy them when cocooning inside by a toasty fire watching the snow fall outside. After all, ice cream is ice cream and my feeling is that these frozen treats make a great snack at any time of the day, and any time of the year. It is always good to be prepared for anything and once made, these goodies can be happily stored in the freezer until such time as they might call your name!